
I do adore the tubular cast on. It’s tidy, and stretchy, and in fine gauge yarns before some ribbing it looks positively professional. It’s particularly helpful when you want to get a stretchy rib from a yarn without much memory of its own, which is why it’s the key to a good brim in Slouch 1, 2, and 3.

I’ve tried several different tubular cast on methods; this is the one I currently prefer. I won’t say it’s the Best Method Ever—that’s subjective, and I’m fickle. It’s the one I used for these samples, and it worked well for me. Here’s how you do it:
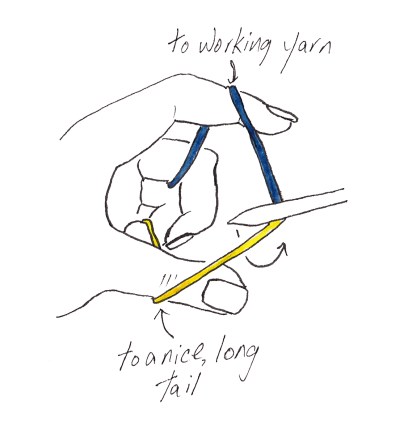
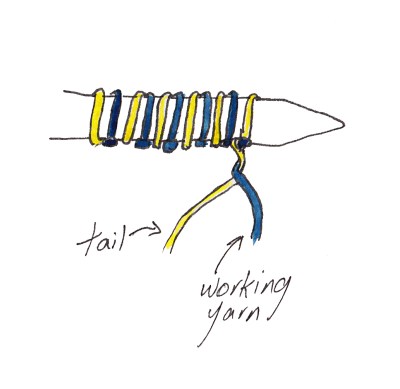
Step 1: First Stitch
Hold yarn as for a long tail cast on, with working yarn over your forefinger and the tail over your thumb.
Bring needle down onto yarn between thumb and forefinger, then under the tail and up, making a loop on the needle.
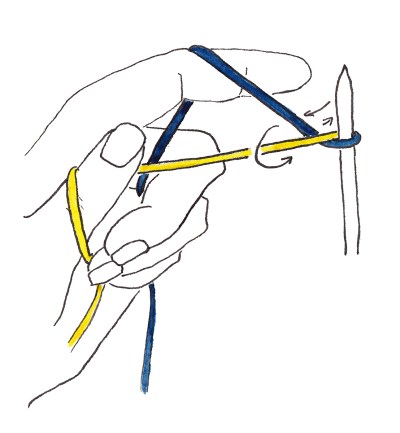
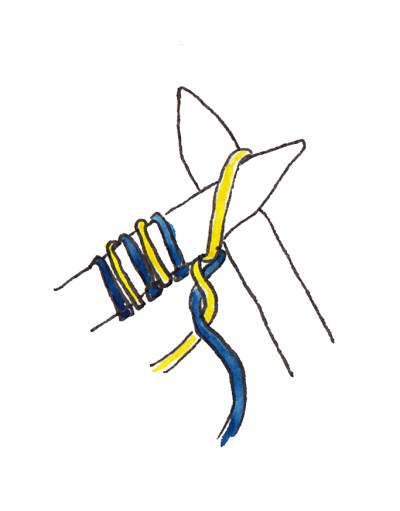
Step 2: Second Stitch
Bring needle under the working yarn, over the tail, back under the working yarn, and up.
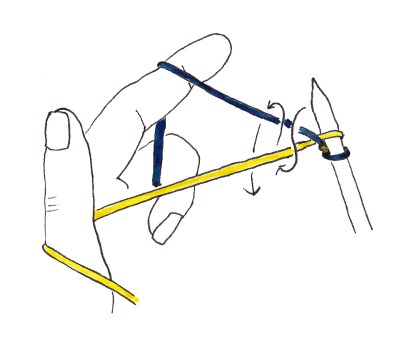
Step 3: Third Stitch
Bring needle in front of and under the tail, over the working yarn, and back under the tail.
Third stitch completed:
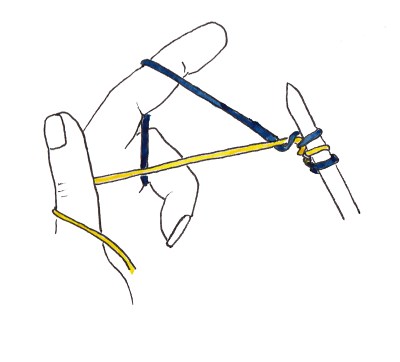
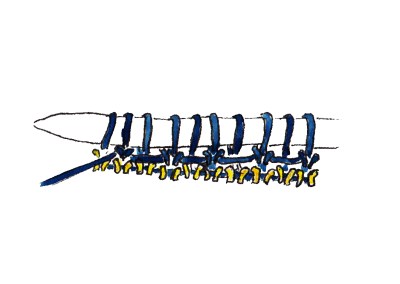
Repeat steps 2 & 3 until you have the desired number of stitches. Wrap tail around the working yarn to secure the last stitch.
Counting stitches is tricky with this cast on, so I place a marker every 20 stitches as I go.
Step 4: First Set-Up Row
Set-up rows are worked flat, whether or not the project is worked in the round.
Knit 1, slip 1 with yarn in front. Repeat to end of row. (If you have an odd number of stitches, this row ends with knit 1.)
Half of the stitches will be seated backwards. Work those stitches through the back of the loop in the first or second row.
Step 5: Second Set-Up Row
Here, you knit the stitches you slipped in the previous row and slip the stitches you’ve knit.
For an even number of stitches: Knit 1, slip 1 with yarn in front. Repeat to end of row.
For an odd number of stitches: Slip 1 with yarn in front, then work rest of row as above.
You’re done! Continue from here as the pattern directs. If you’re joining to work in the round, use the tail from the cast on to close the little gap in the cast on edge during finishing.

Another great, easy to understand post!